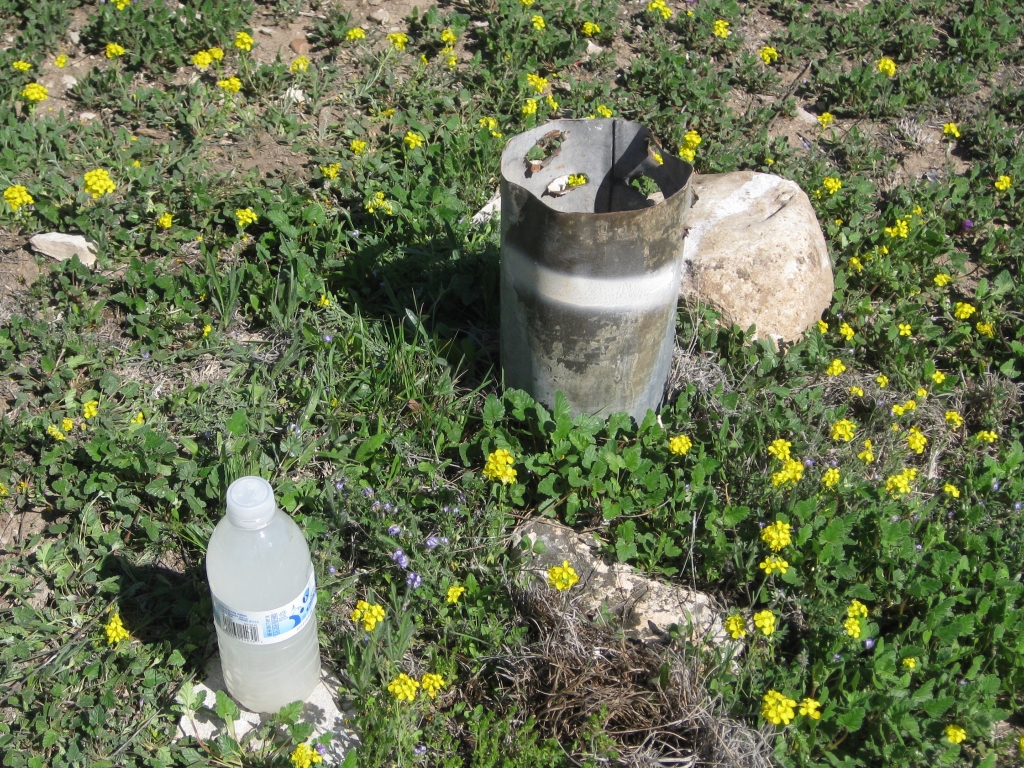
One of the first projects was fixing up the old tin cased well with a new riser and a submersible pump
One the right, is a picture of the original wellhead for the water well that we found on the property. I was told by a local water well installer
that it was from an 1940 era 'tin cased' water well. I retrieved a sample of the water to examine and use the opportunity
to measure the depth. Well depth was 126' total, with about 80' of water column above bottom. I decided that if nothing else, it would make sense to
use it as a source for "semi-clean" water. So the intent for now is to use it for everthing except drinking.
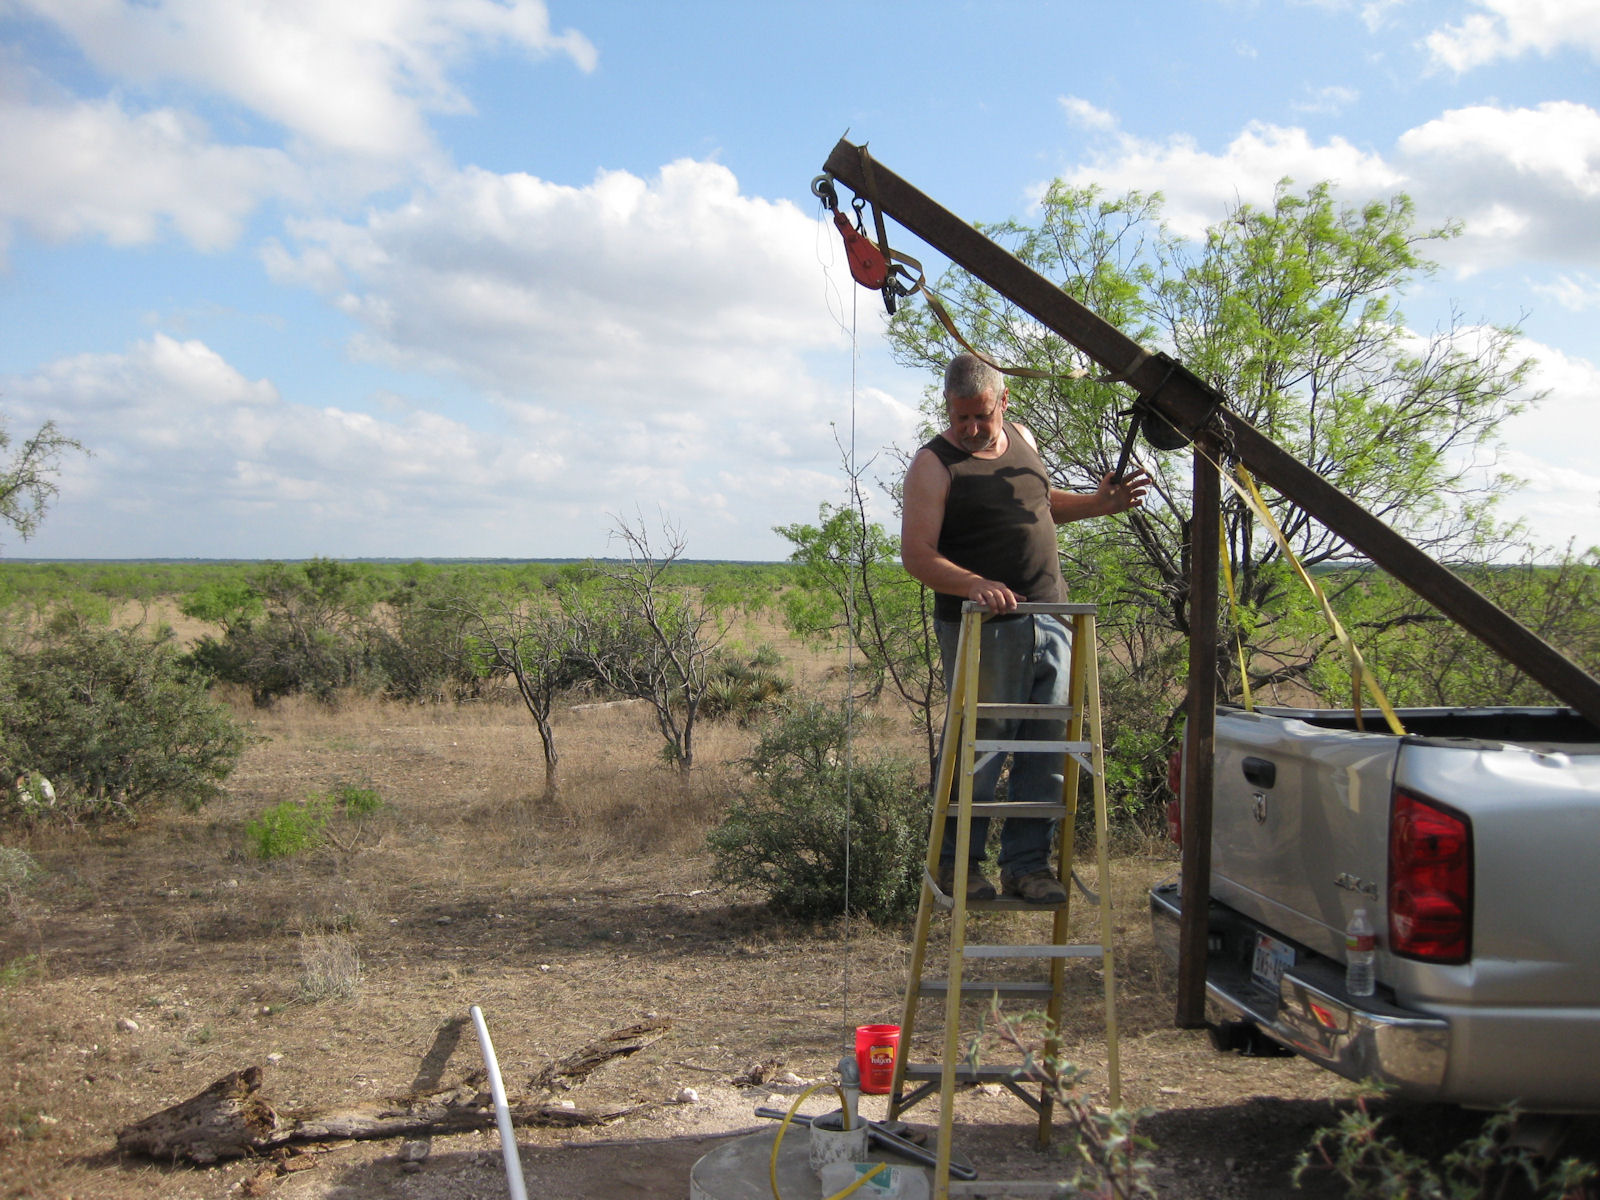
With the help of my brother Don, we dug down about three feet around the old riser, put about a yard of concrete
with some rebar, and a new 6" schedule 40 PVC riser around it before installing a 10 GPM submersible pump
in the hole.
Below- my brother Don is lowering the pipe with the pump attached, the final foot or so into
the hole.
The picture to the right, shows the new cemented wellhead with the down hole pipe hanging in the hole.
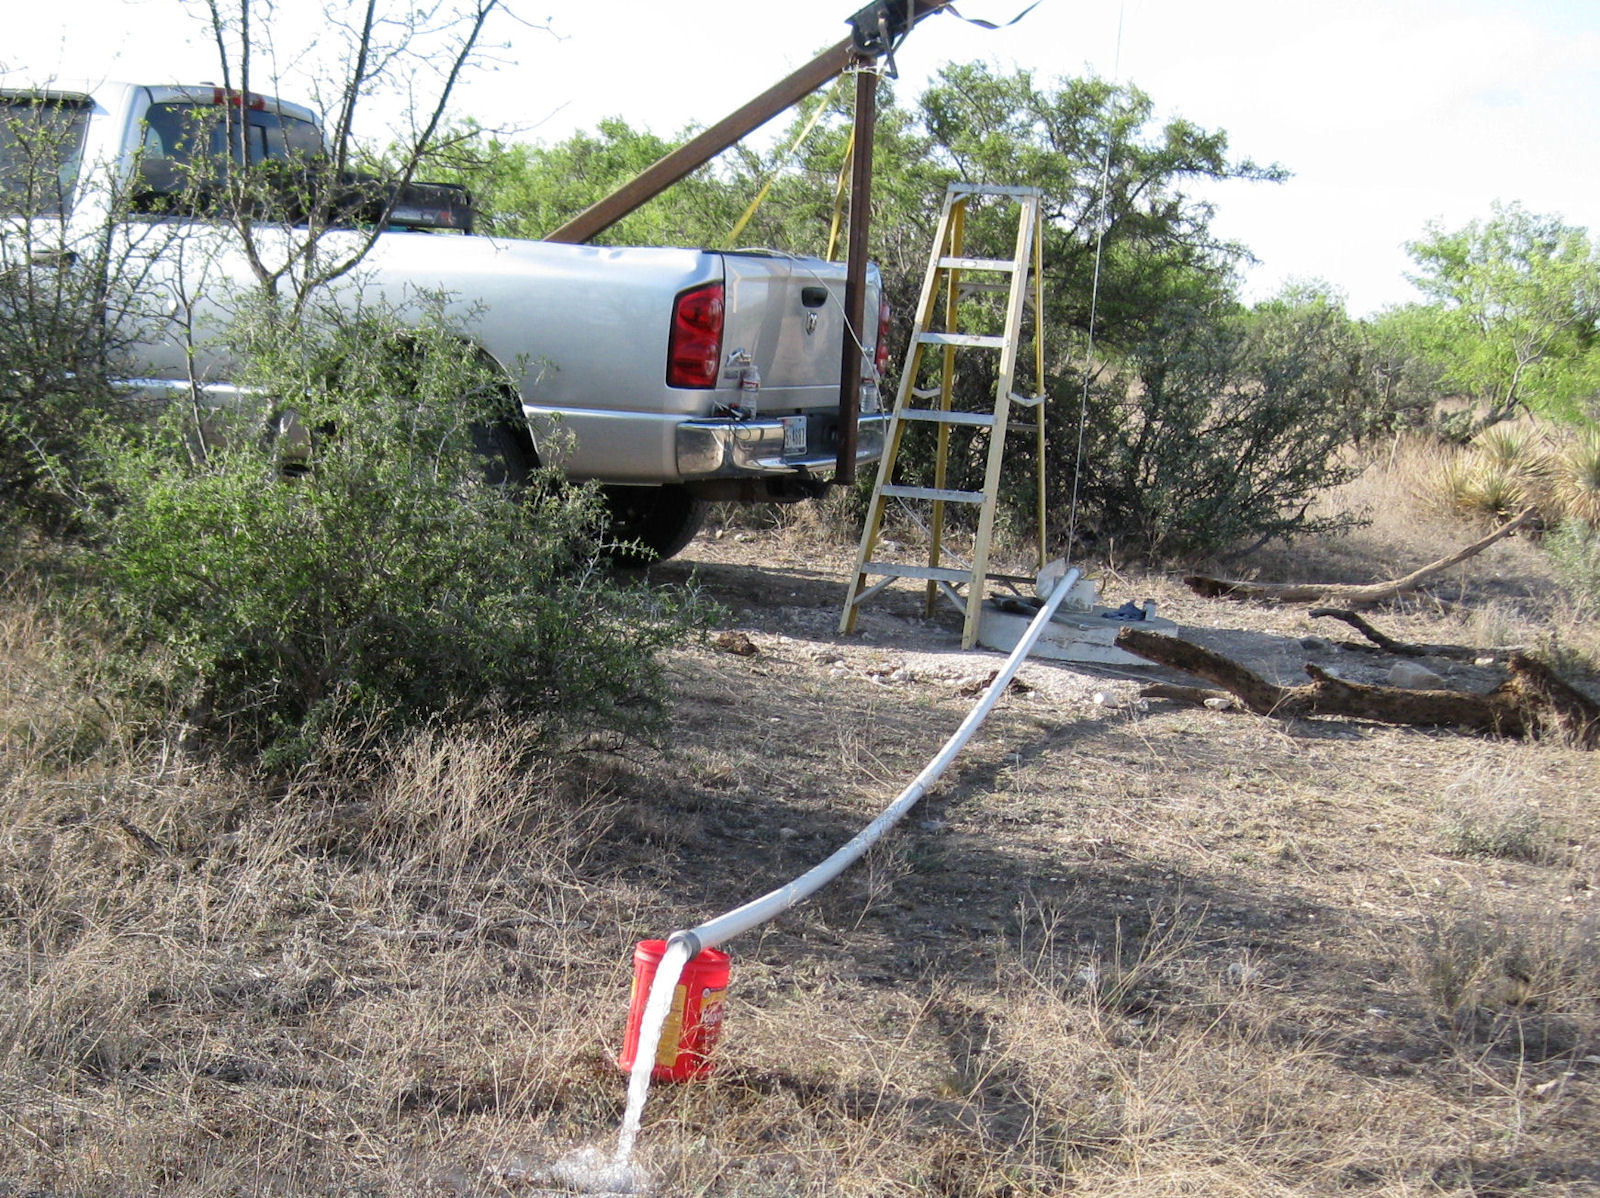
We finally power up the pump, (using the generator since the power cables haven't been run yet)... and wallah!
We have a gusher! Well, not exactly a gusher, but at least we do have water coming out of the ground. We knew
it was a slow recharge well, and we were not disappointed. We timed it, and figure the well was producing about
40 gallons per hour. We pumped it dry, (down to the pump level) twice, and found that after full recharge it takes
just over 6 minutes to run dry at ~10 gallons per minute. It appeared to fully recharge in about 1 1/2 hours.
the next project was installing the site electrical service.
The reason this was not the first item on the agenda (just below the highest priority met tower of course),
was because we had to wait until Sharyland Utilities company had removed the old lines and poles. These would
have later interfered with the preferred runway placement.
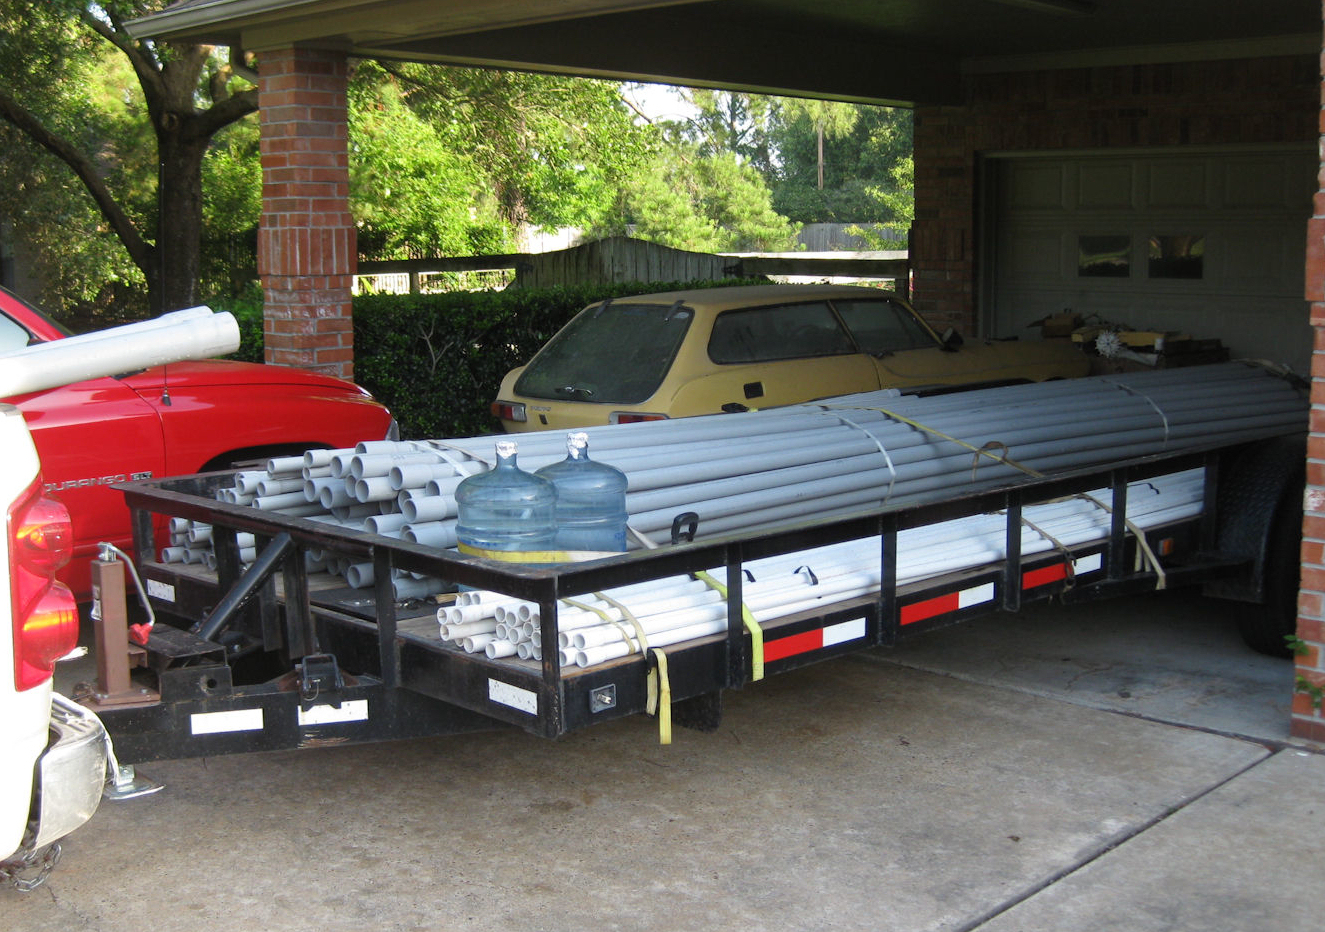
On the right is the load of conduit and water pipe I hauled out to Eden to begin the underground untilities
work. I did not use most of this until much later. Some of this is for the turbine power runs from the data and
power conversion center to the test pads. There is also conduit and water pipe for the long run to the colocated
VT10 site and water well. I originally had very high hopes, but what turned out be unrealistic expectations
of what was doable each day with the mini-excavator I was renting for a week....
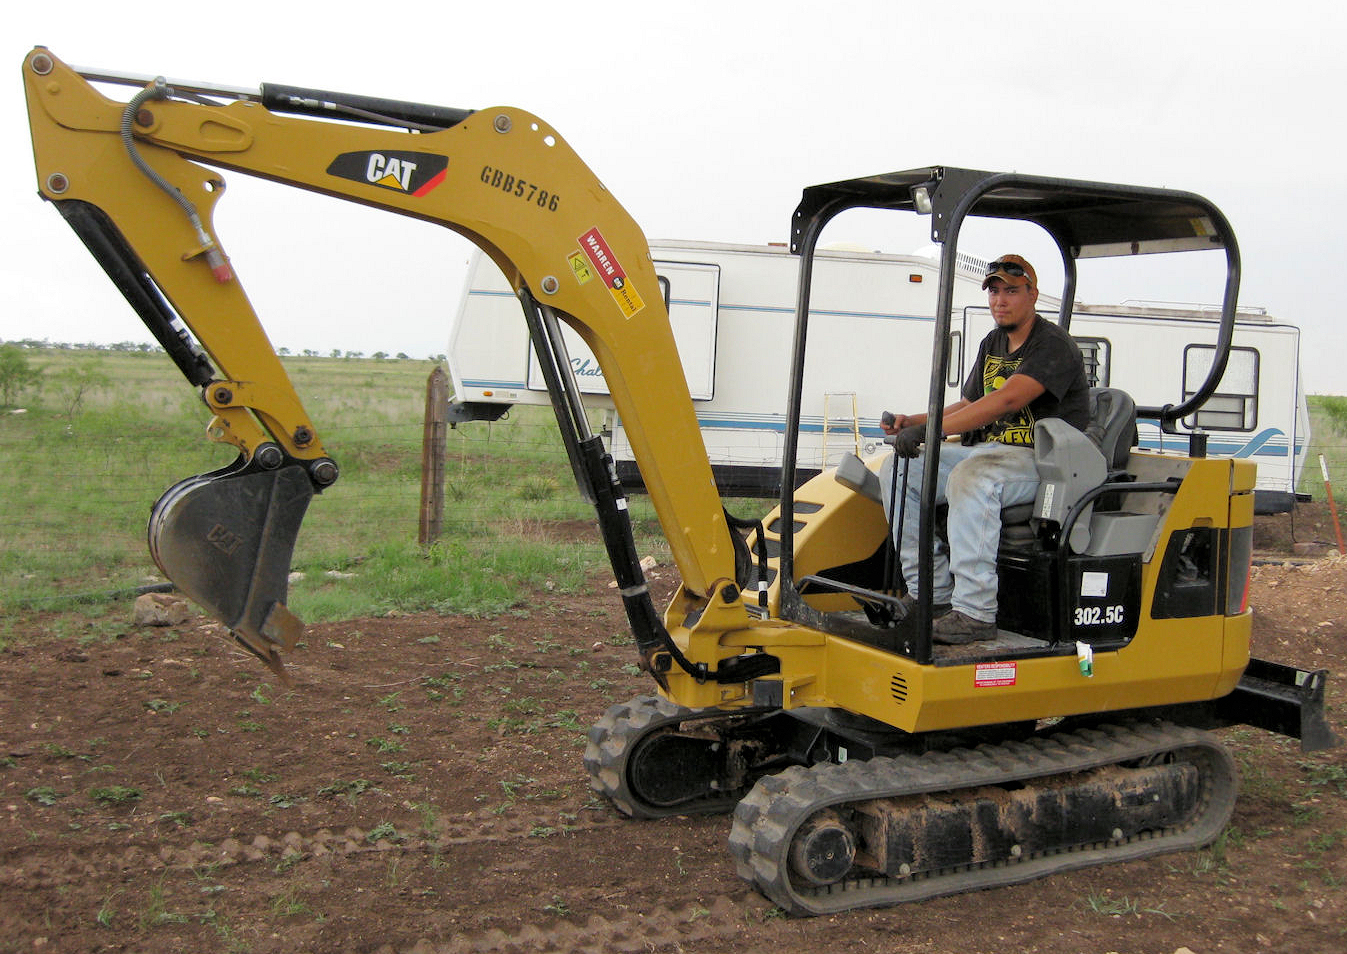
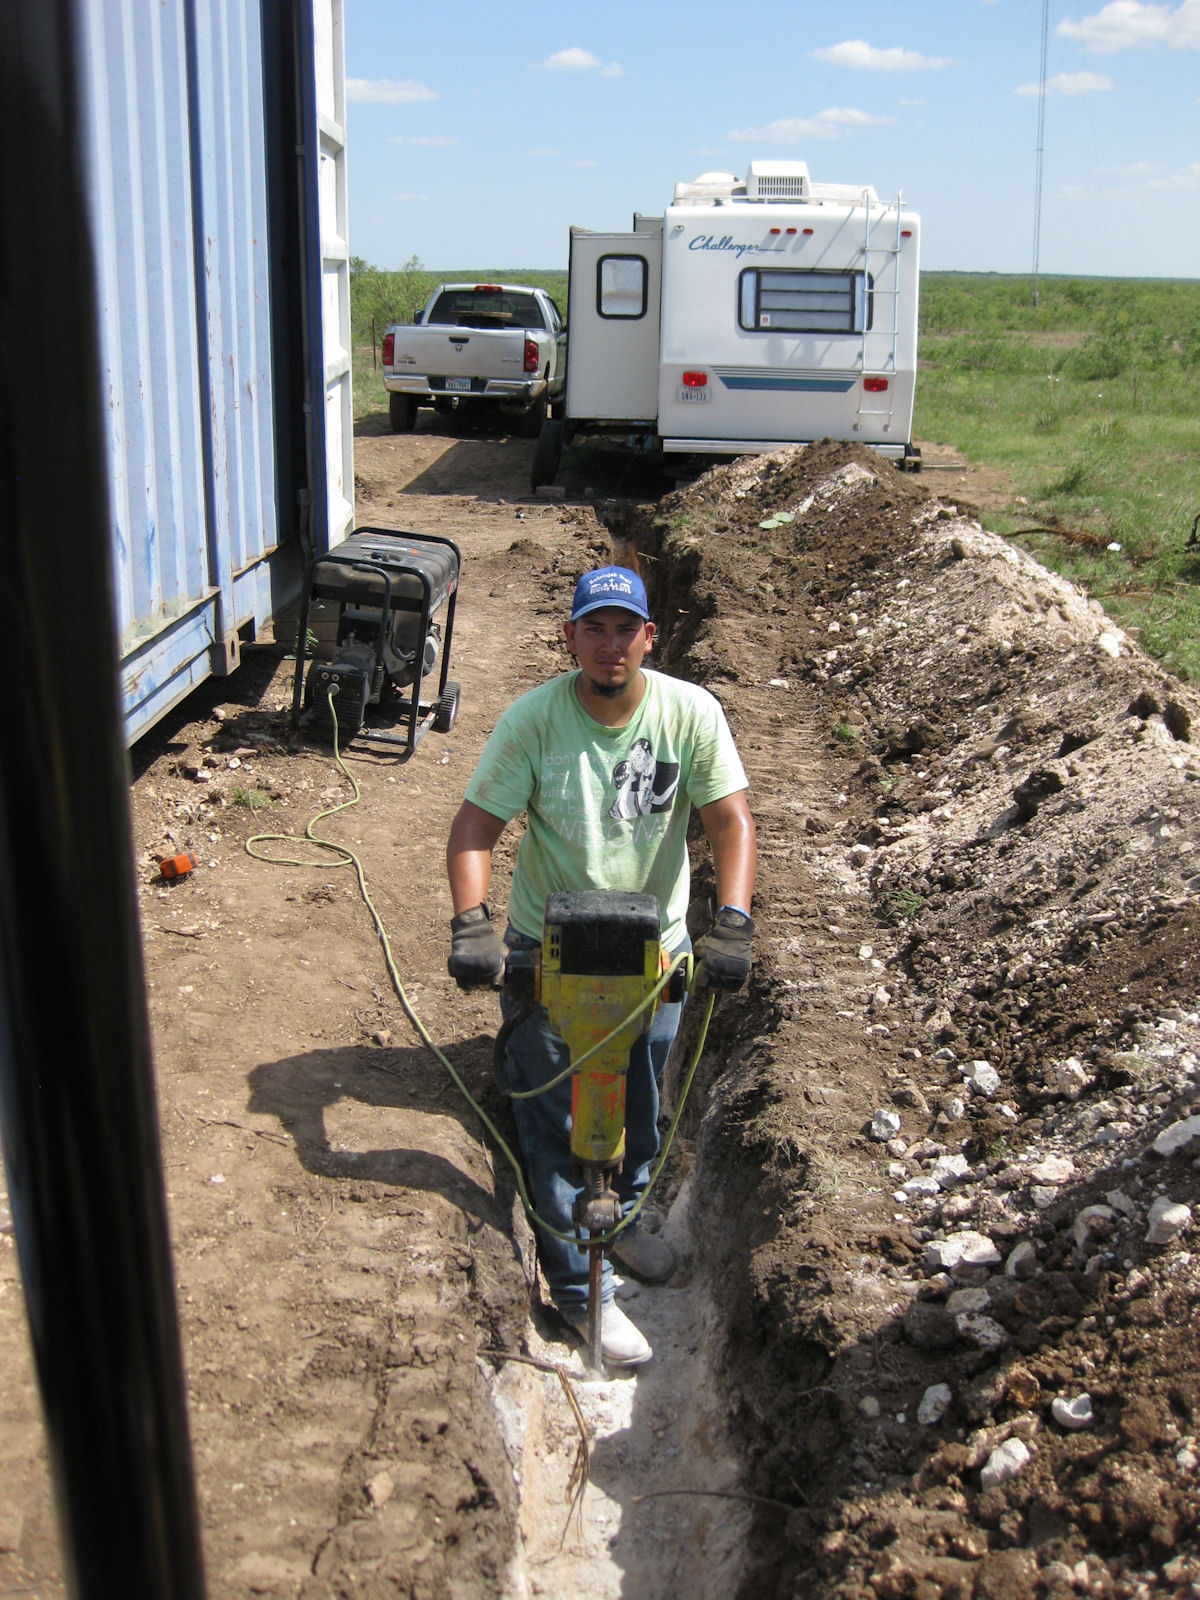
I was able to hire someone local to help me with the manual labor. Ernie is posing on the Cat 302.5 mini-
excavator that we picked up in Abilene for the week. Ernie did not end up doing much on the excavator, partly
because I was having such a blast on it myself. He turned out to be much more help with the jack hammer
in some of the spots that had hard rock too close to the surface.
In the picture below, Ernie is on it in a high spot on the main run to the power pole and the 200 amp
site drop.
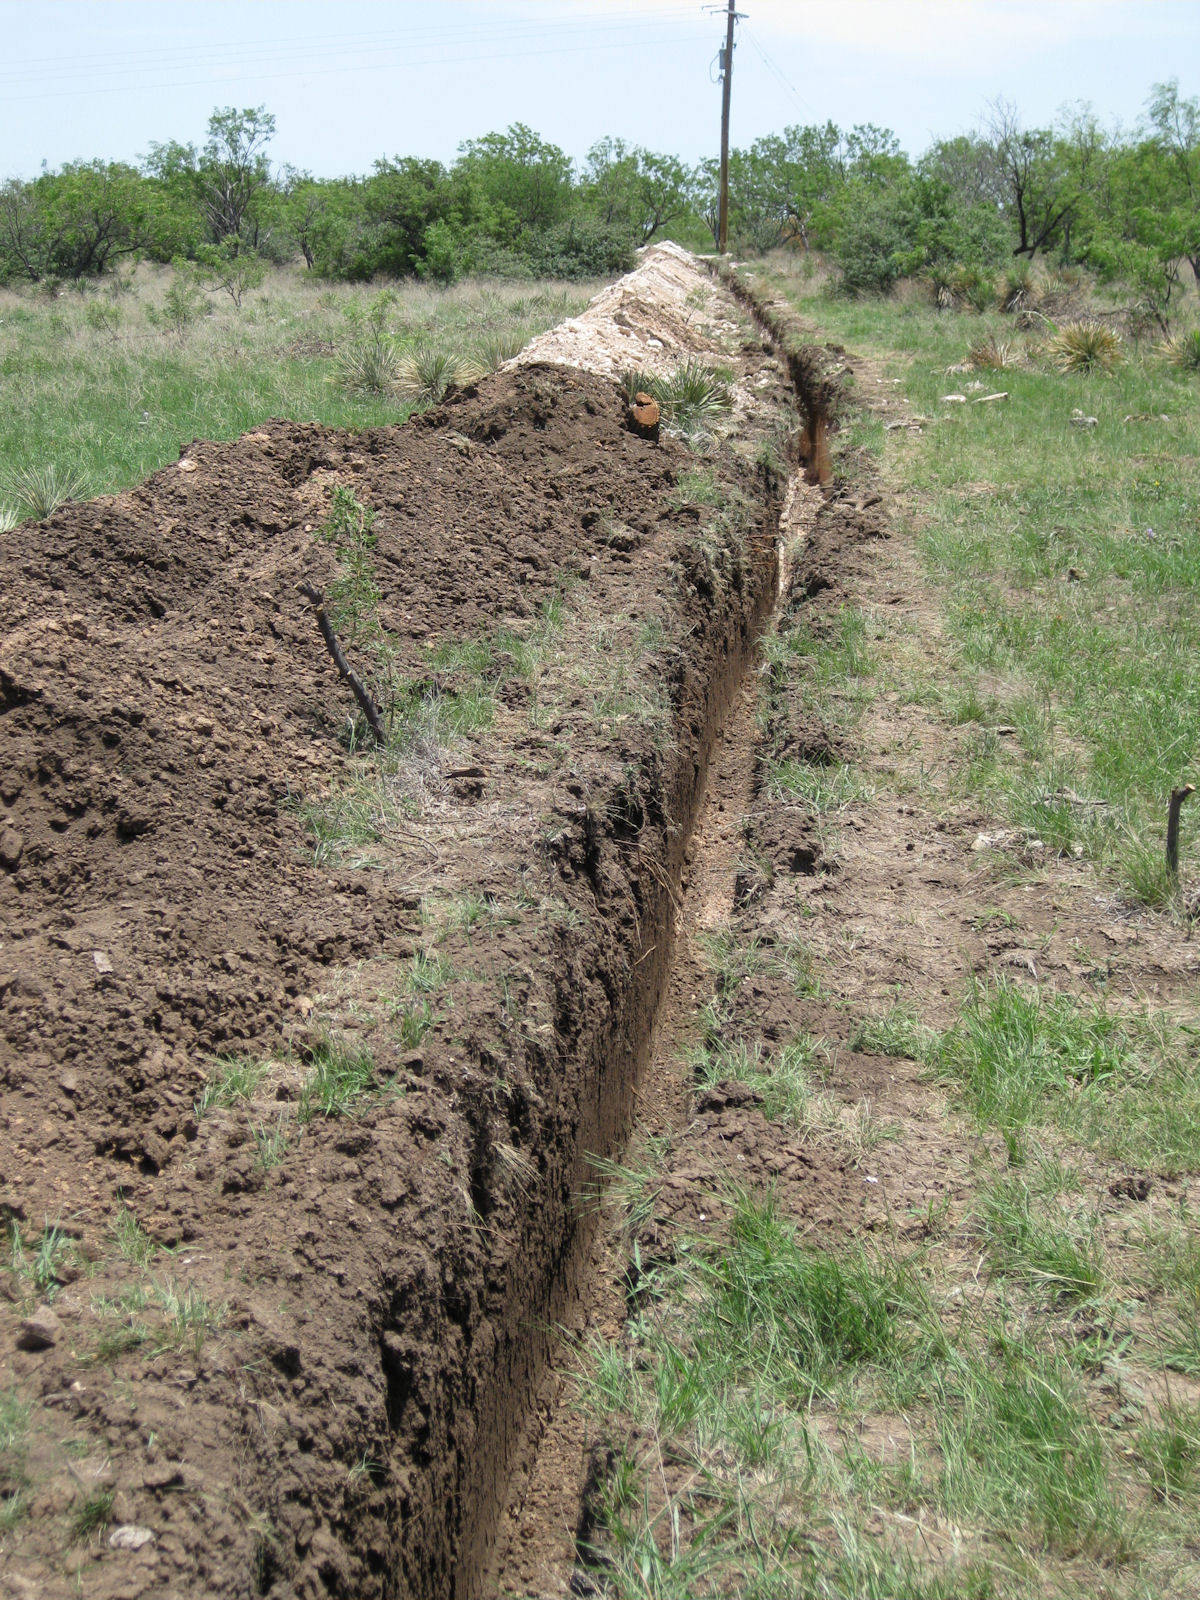
The long trench to the right is from the power pole drop to the main panel which is installed at
the north end of the storage unit. From there power is distributed to the storage unit, and to the
RV drop
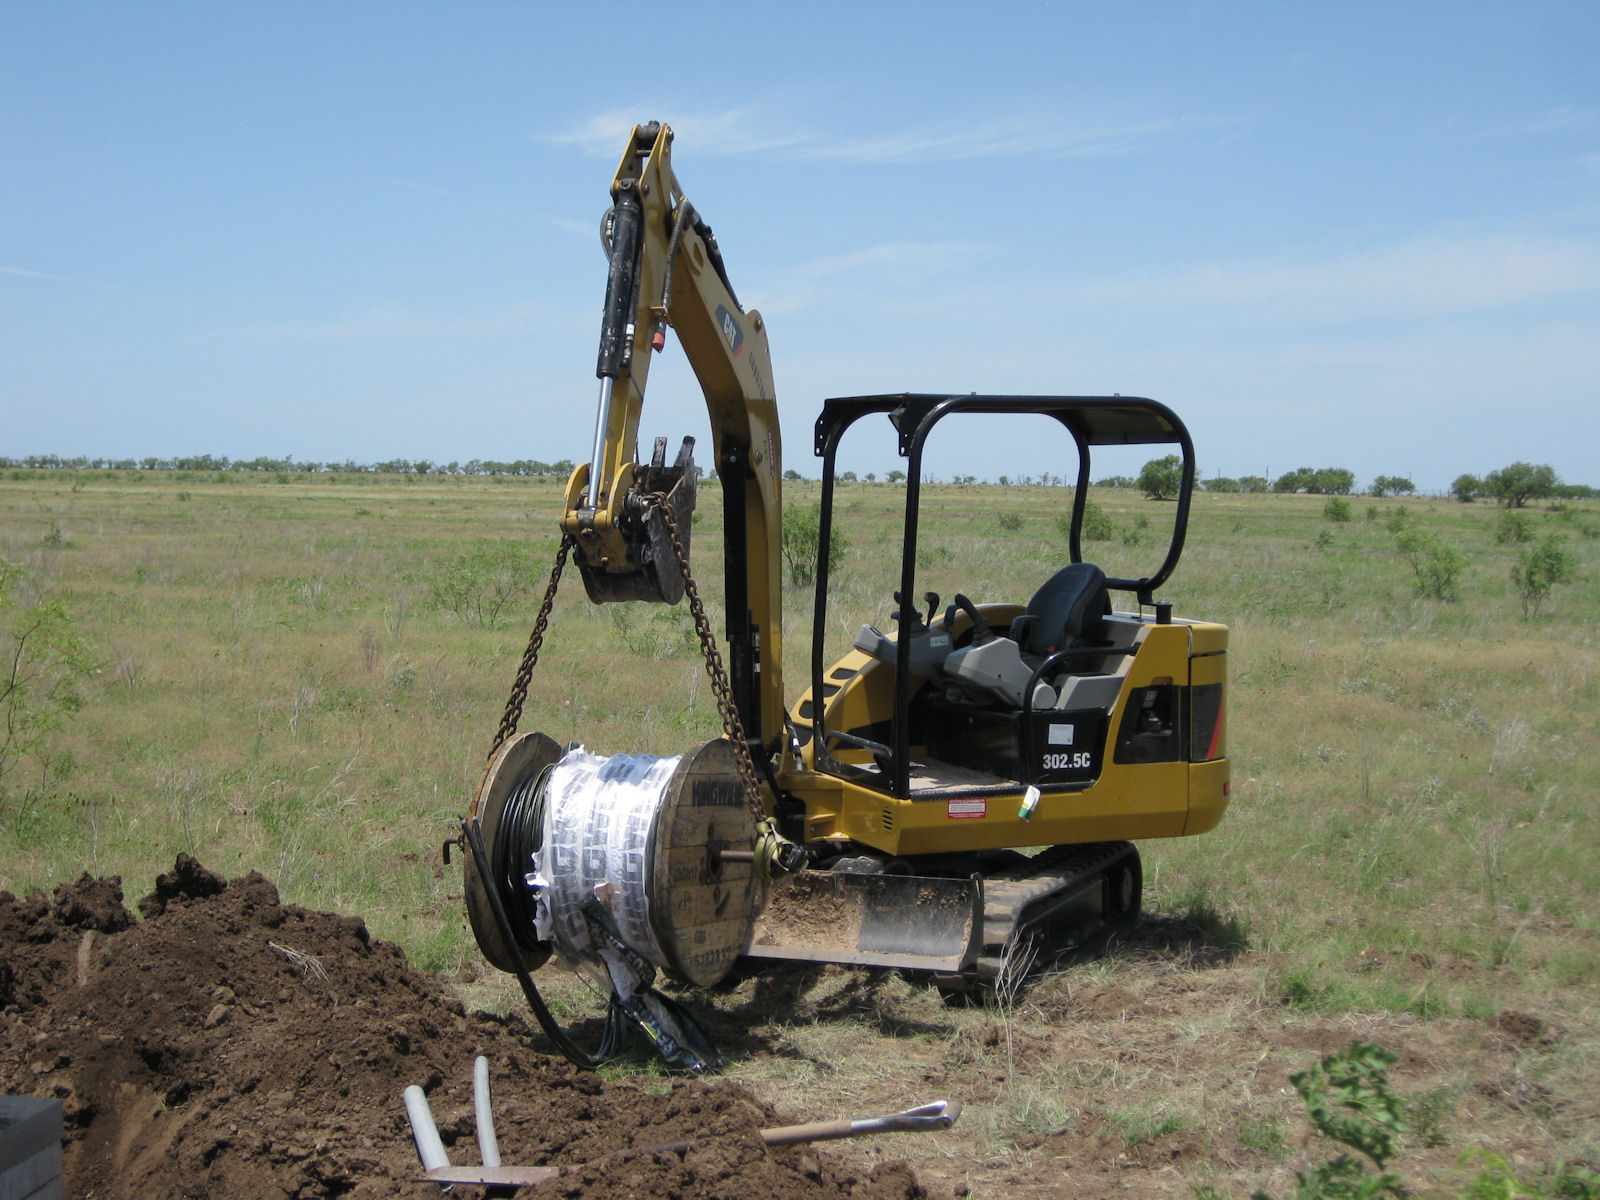
We rigged a hanger and hung the roll of cable from the mini-excavator, so we could pull it off the roll and
into the trench.
After positioning the roll of wire over the trench, we are ready to pull it off the spool and drag it
to the power poll. What we didn't think about was how much 450ft of four plex 4-0 cable weighed, and how
hard it was going to be to drag through the trench. It was certainly a chore, and after the first 200 ft had
to pull extra cable from the reel to a mid point, and then pull that slack back out to the end of the run.
Below, you can find Ernie on the jackhammer again. I'm calling him the rockbreak kid by this time, as it is his
specialty now. He's knocking down some high points in the run between the trailer drop and the main panel here.
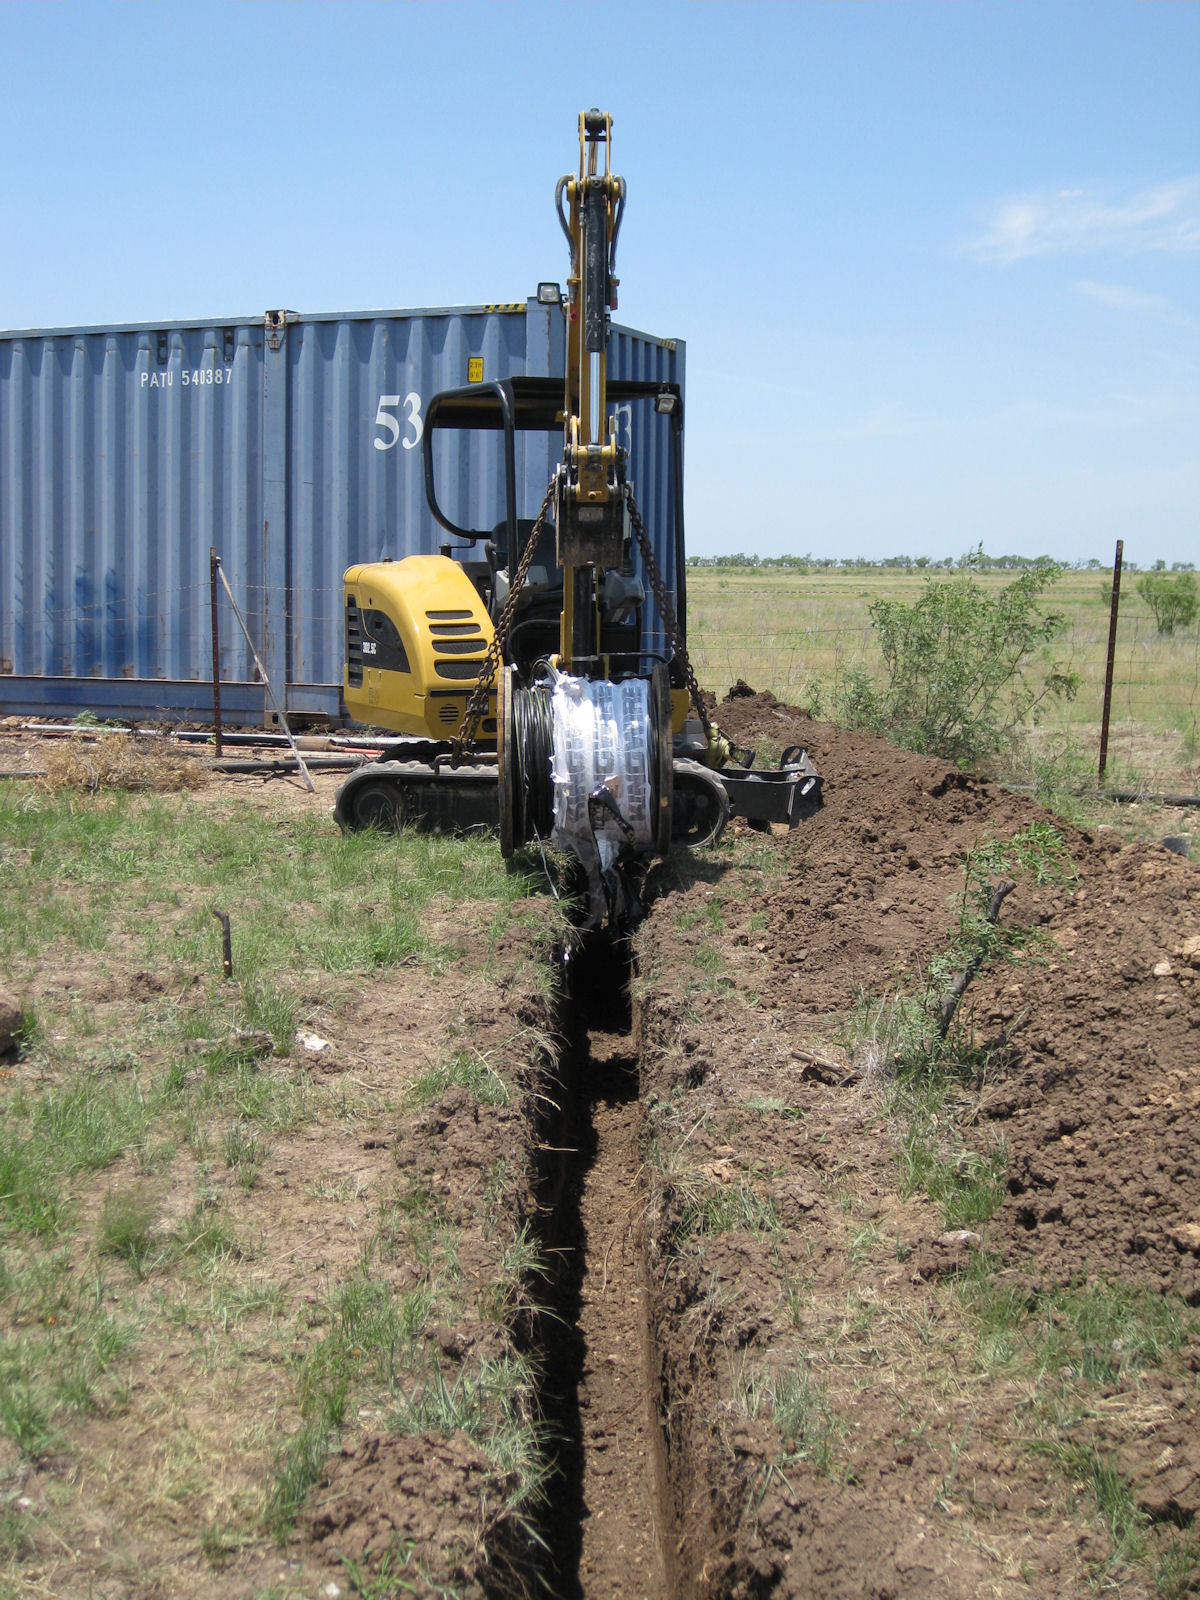
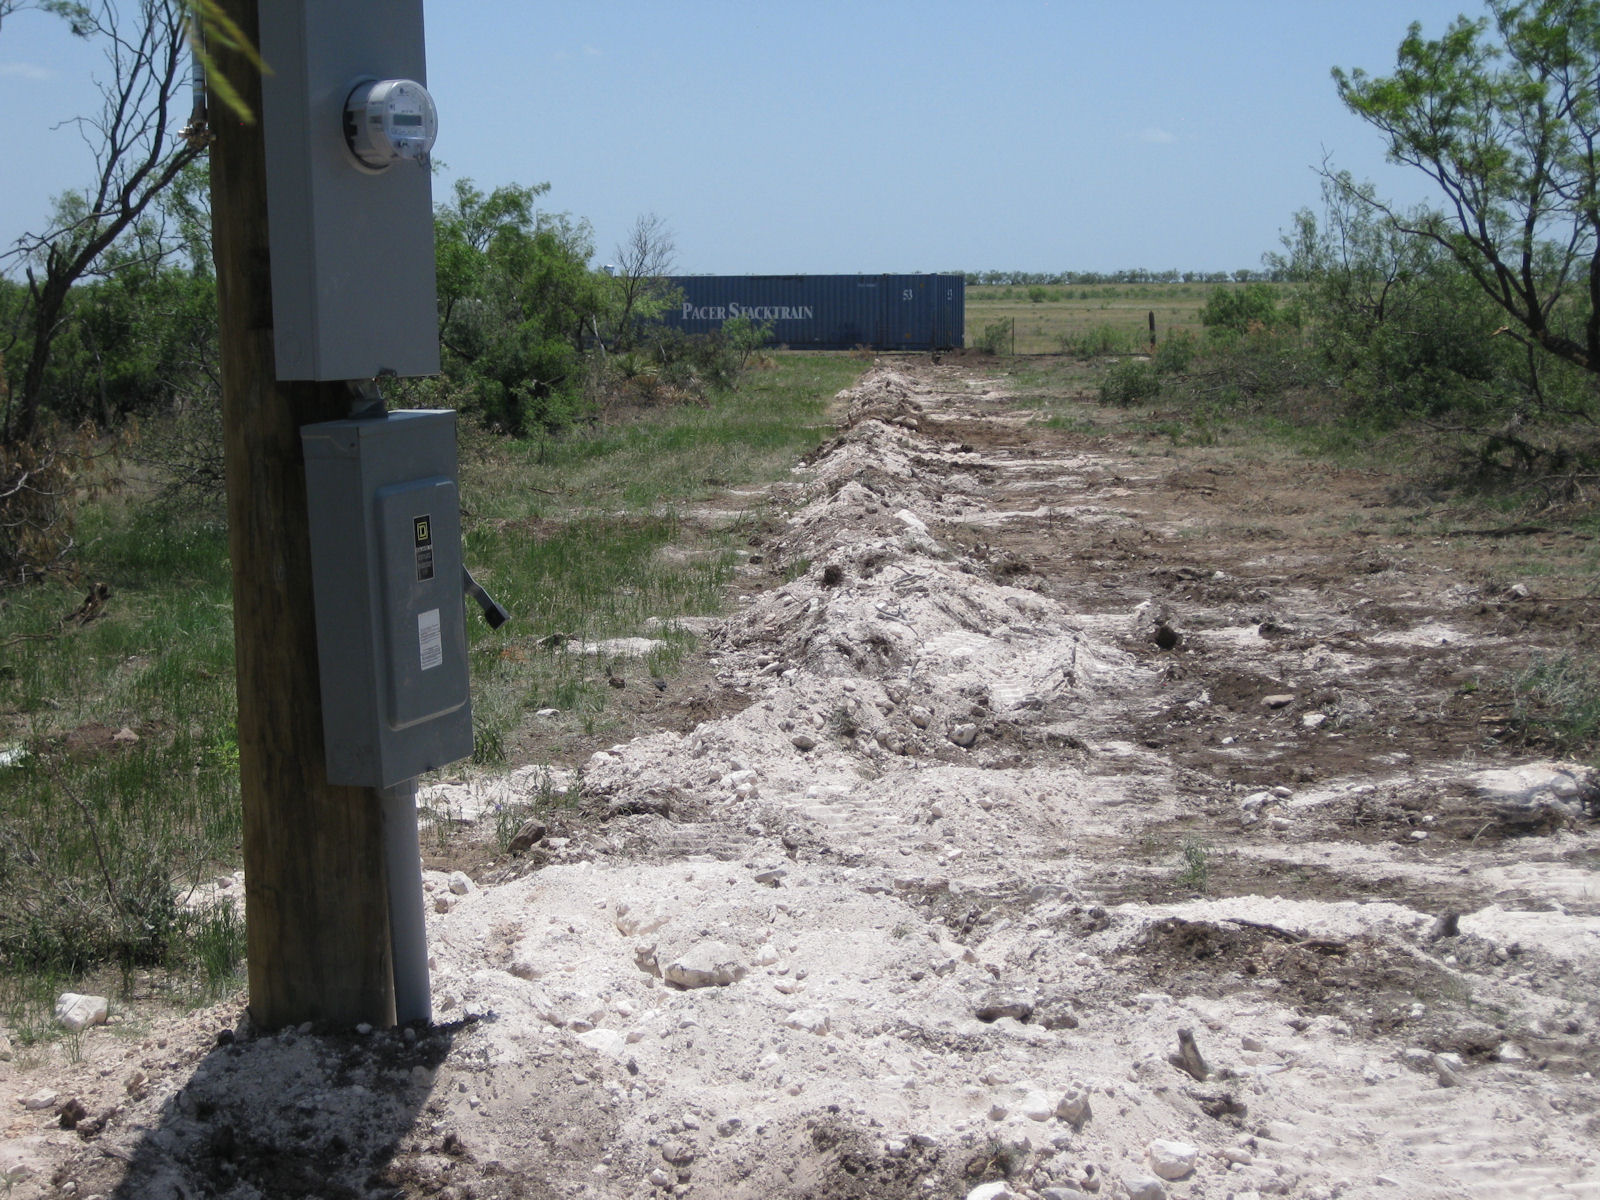
To the right is a view from the power pole back down to the storage container where the main
panel is situated, after we've covered the trench.
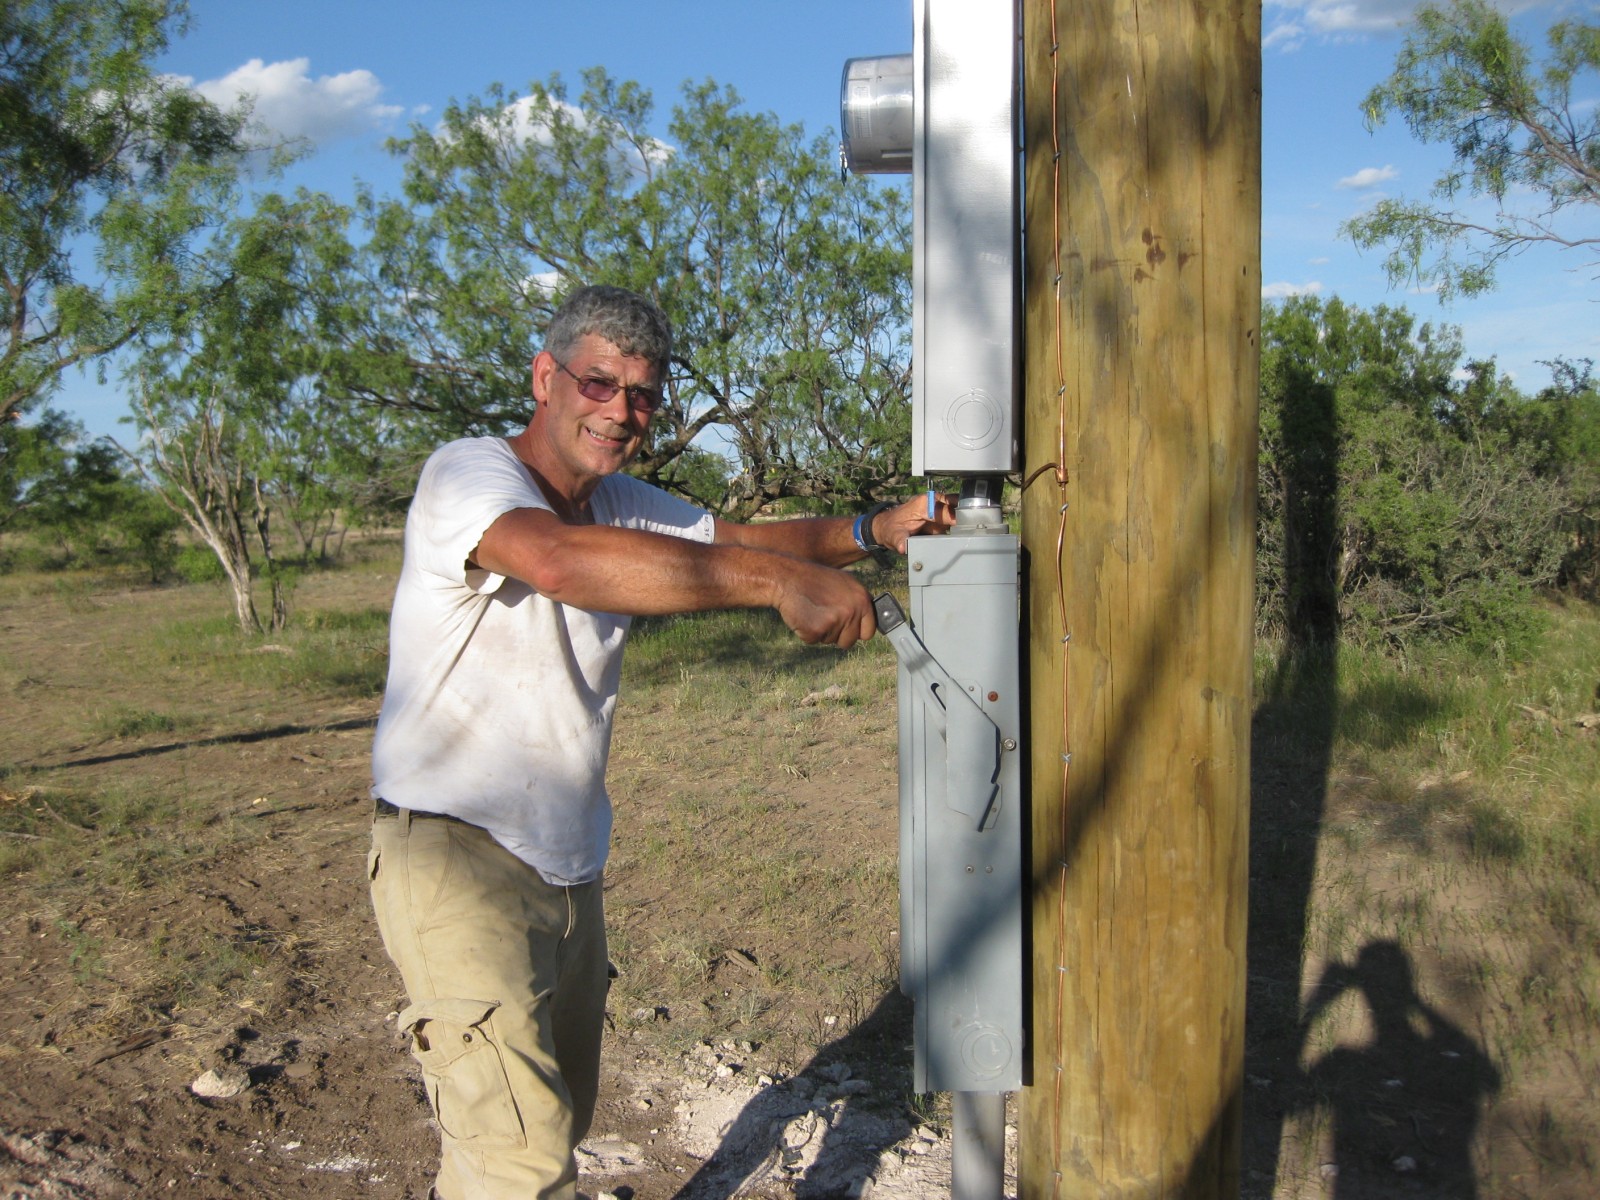
To the right, you see me turning on the power for the 1st time! Do I look happy yet? I'm pretty sure this is actually
on the next trip out, because we ran out of time to get the power panel wired and connected, and
the power company had to come out and do their thing by installing the fuses on the transformer.
We have the mini-excavator loaded back up, and ready to take her home now. We gave the
machine a pretty good workout.
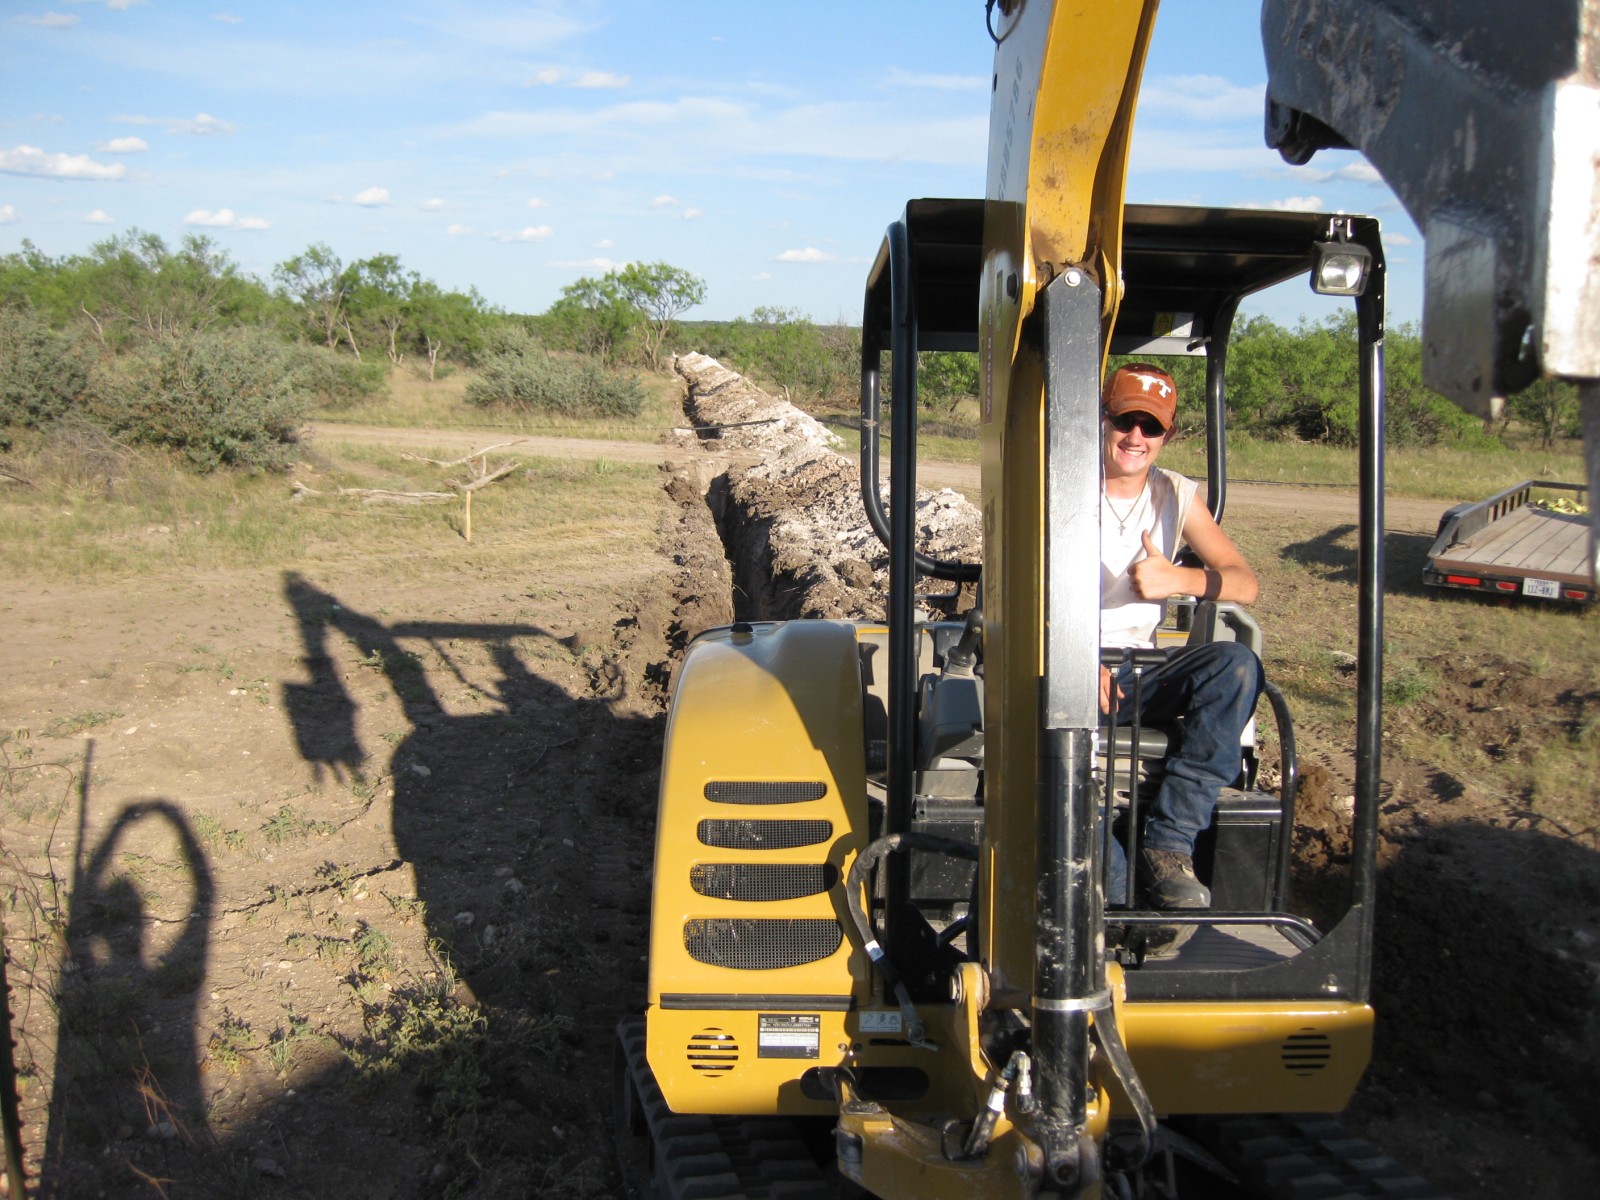
Running power and water line to the well
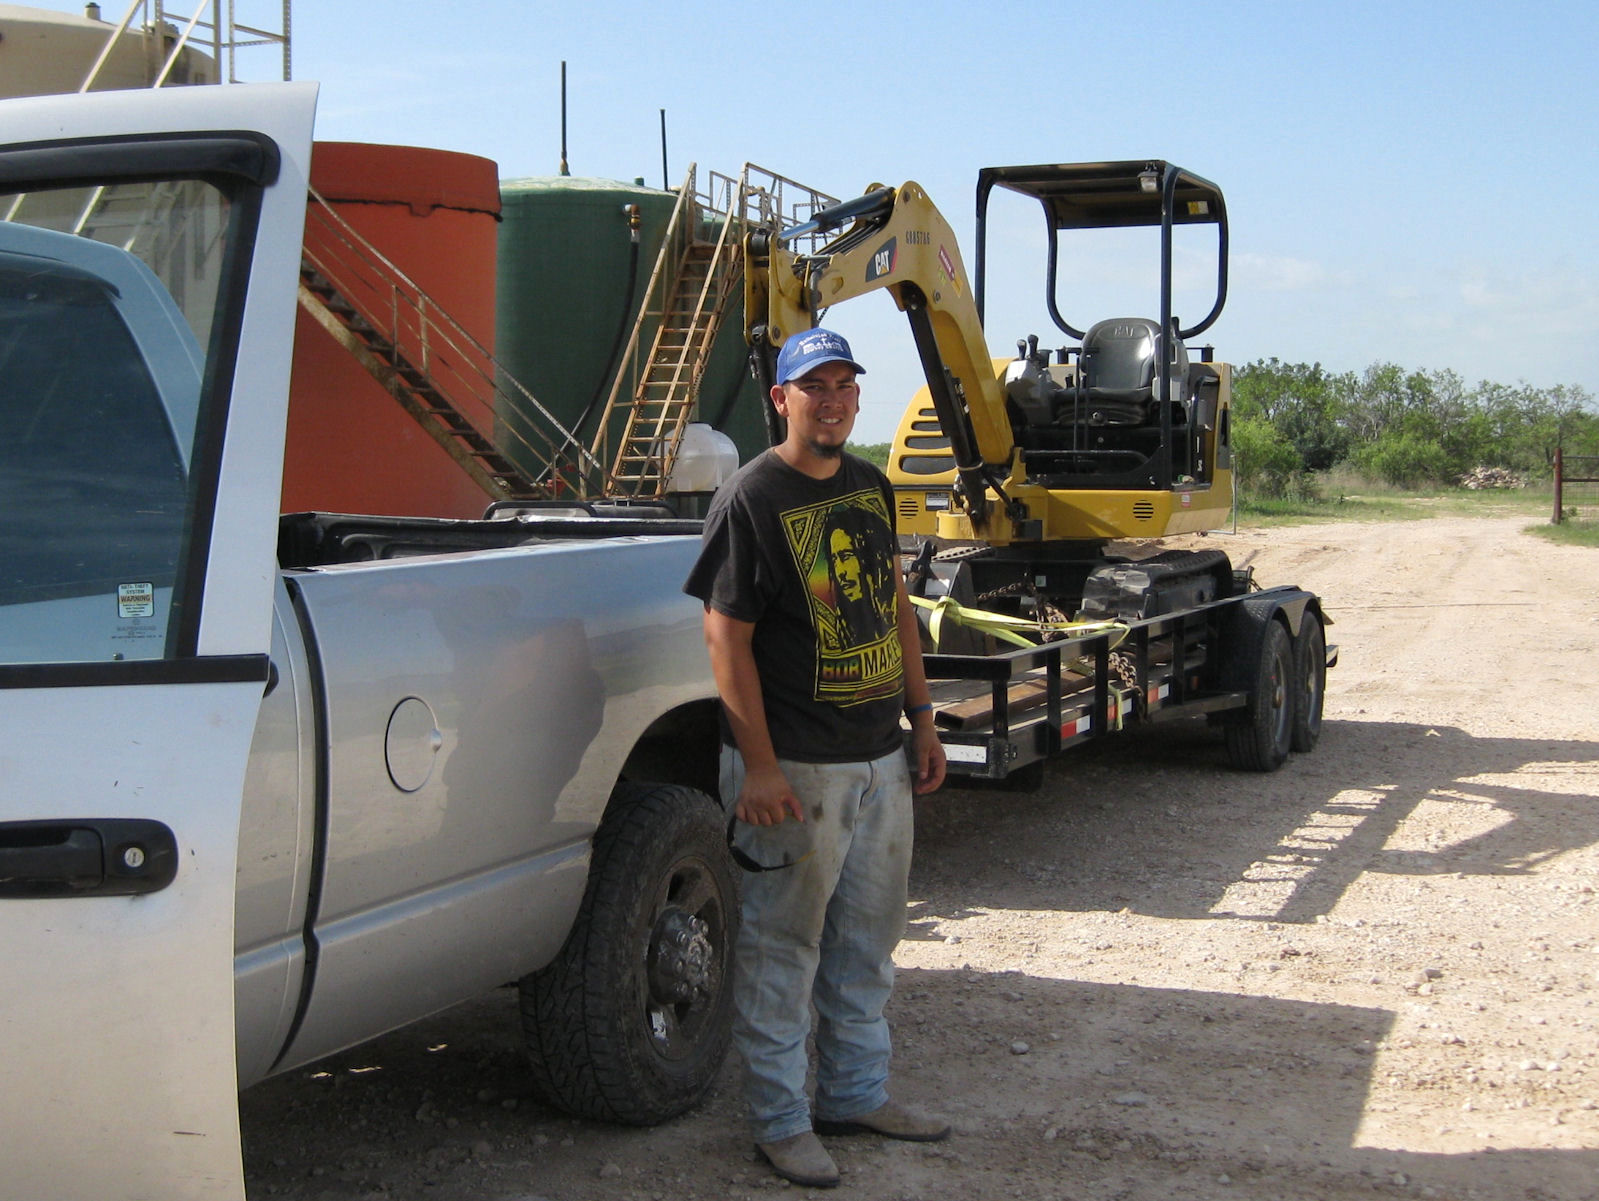
The guy on the CAT is Keegan Howard, my secret weapon on trenching. Keegan (a high school senior at the time)
was recommended by his cousin David Rutherford, as a hard worker.... and he just happened to be available at the last minute
to replace the other two guys that David recommended (who each backed out). Keegan had never operated a mini-
excavator. So I told him to just pretend it was a video game. He caught on really quick and before too long was
wailing away at it. He trenched 400 plus feet in one day! That was nearly twice what I was doing on the site electrical
trench!
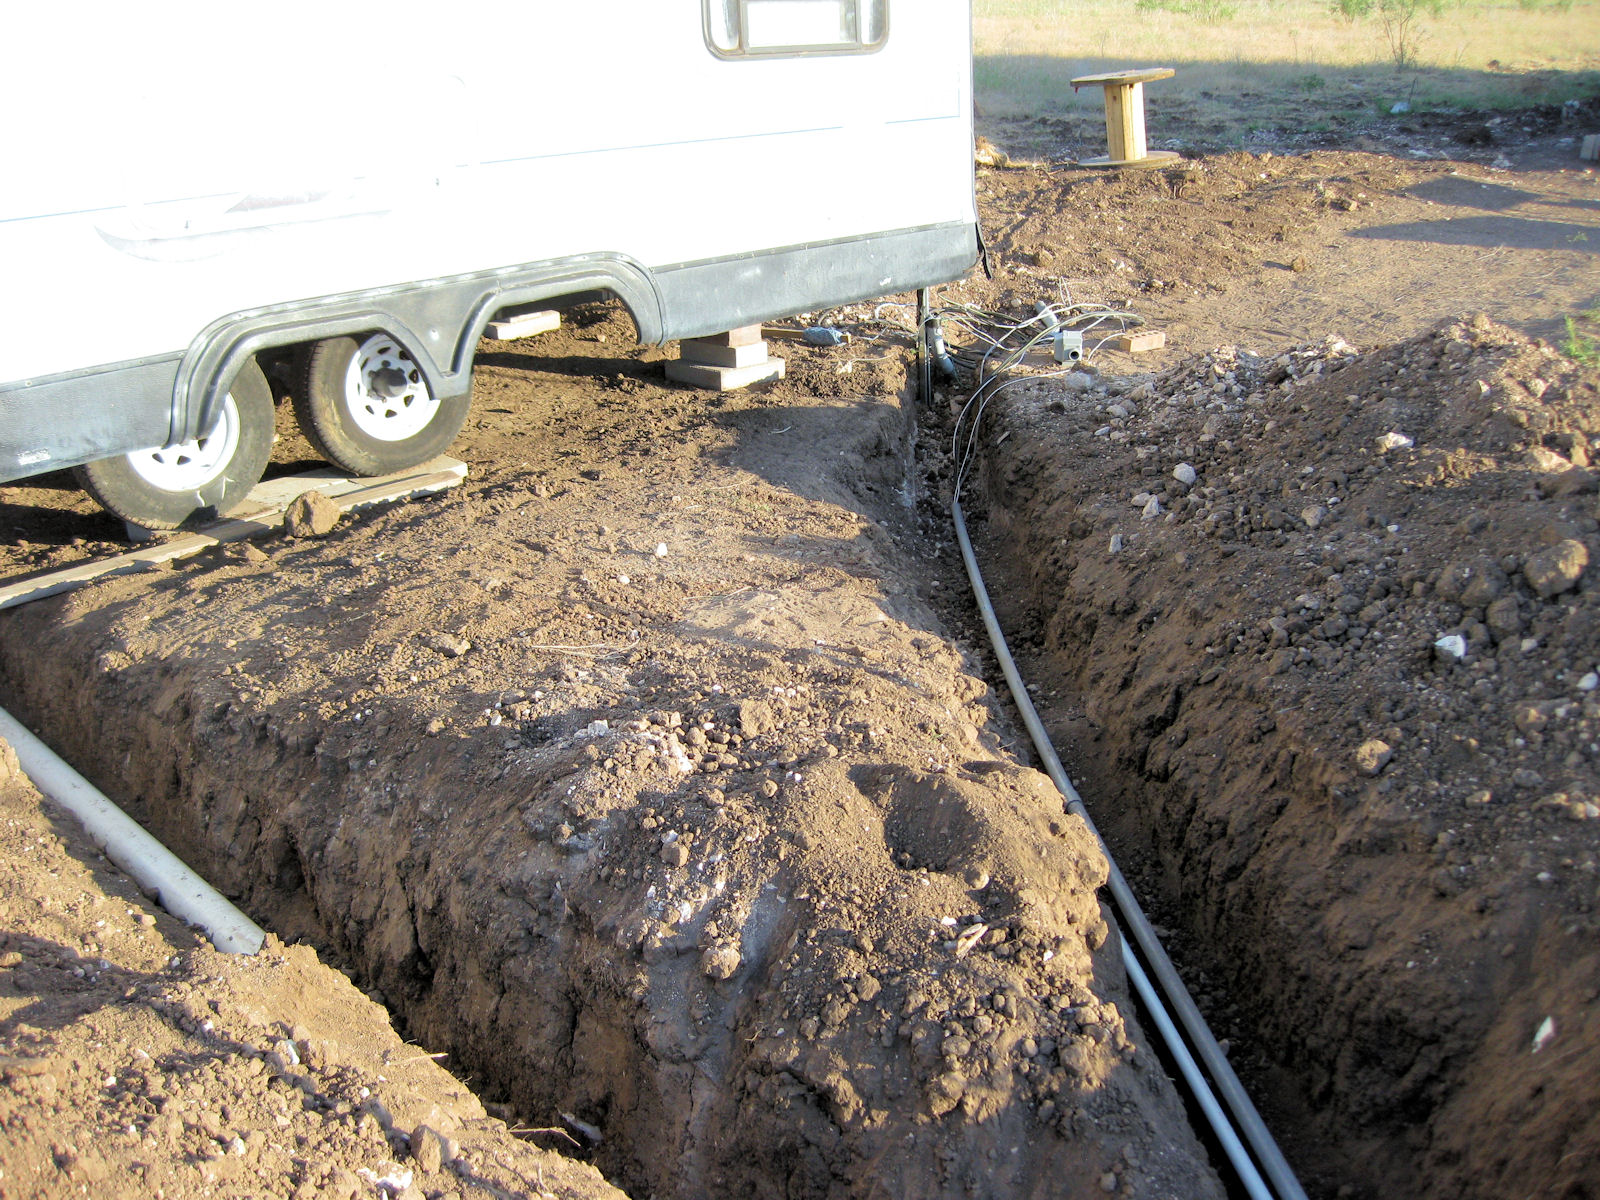
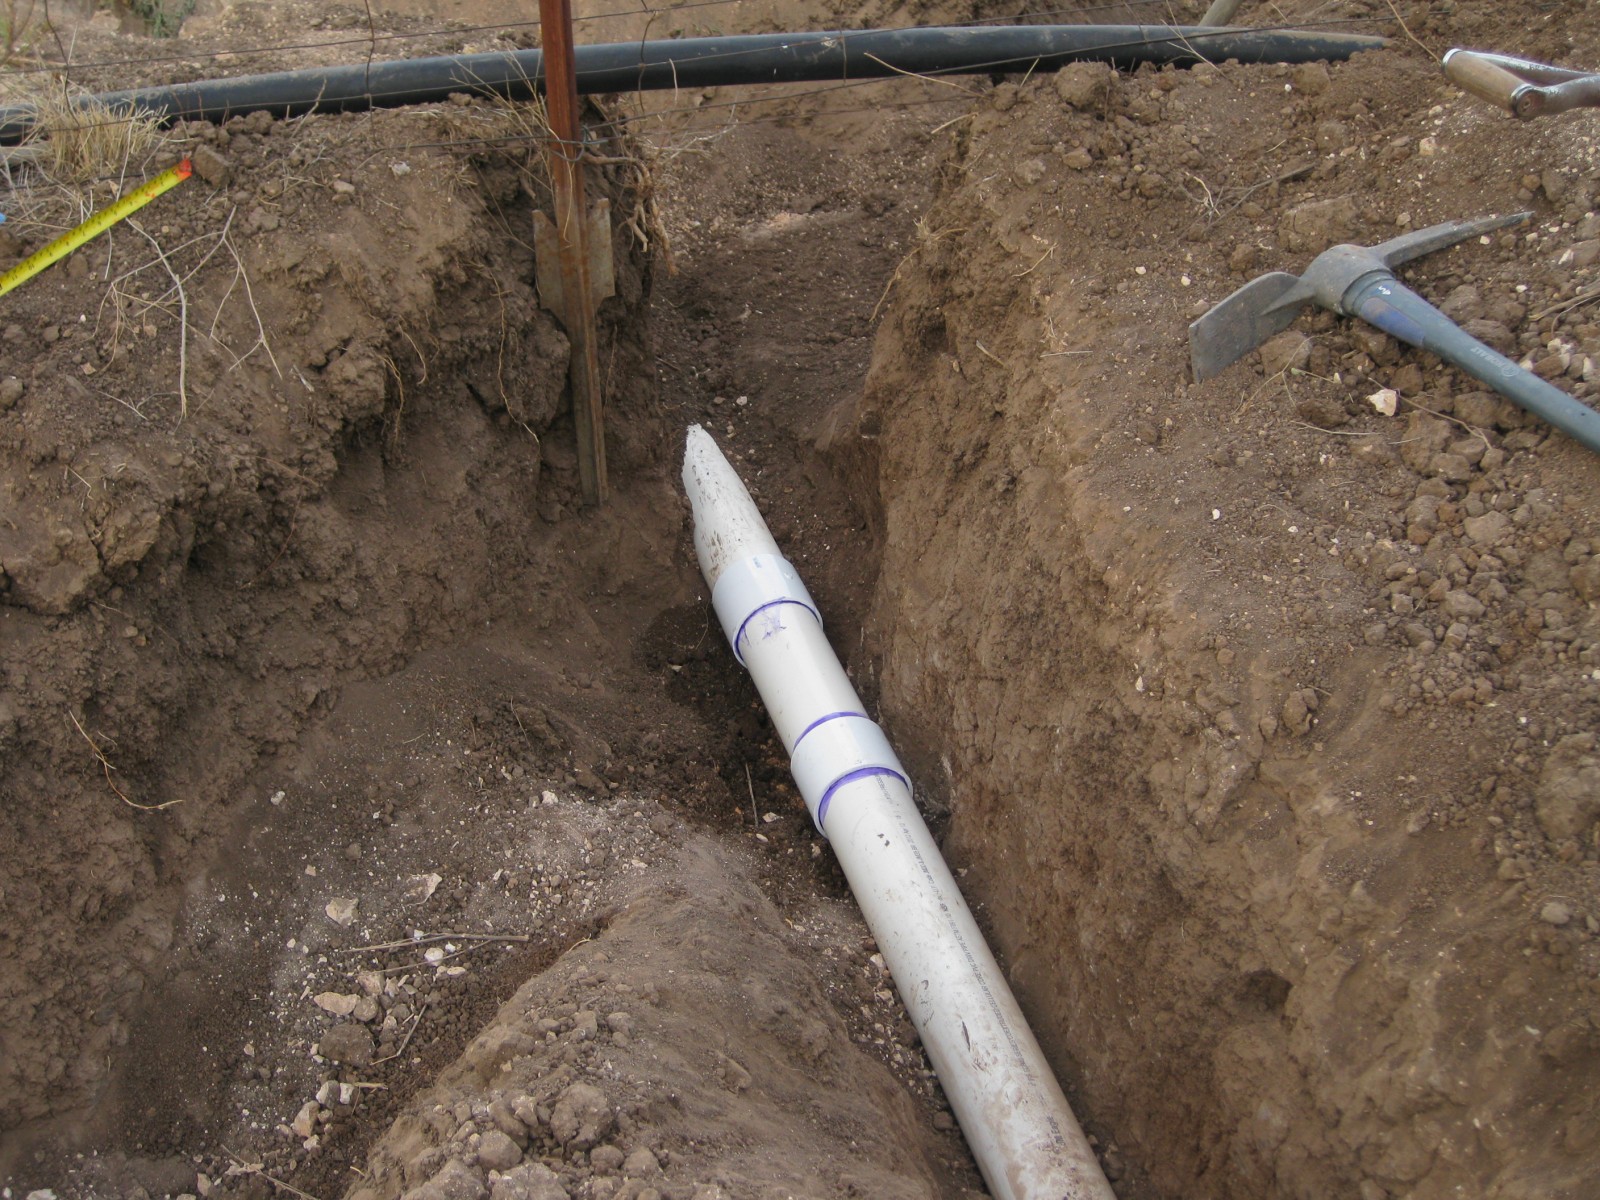
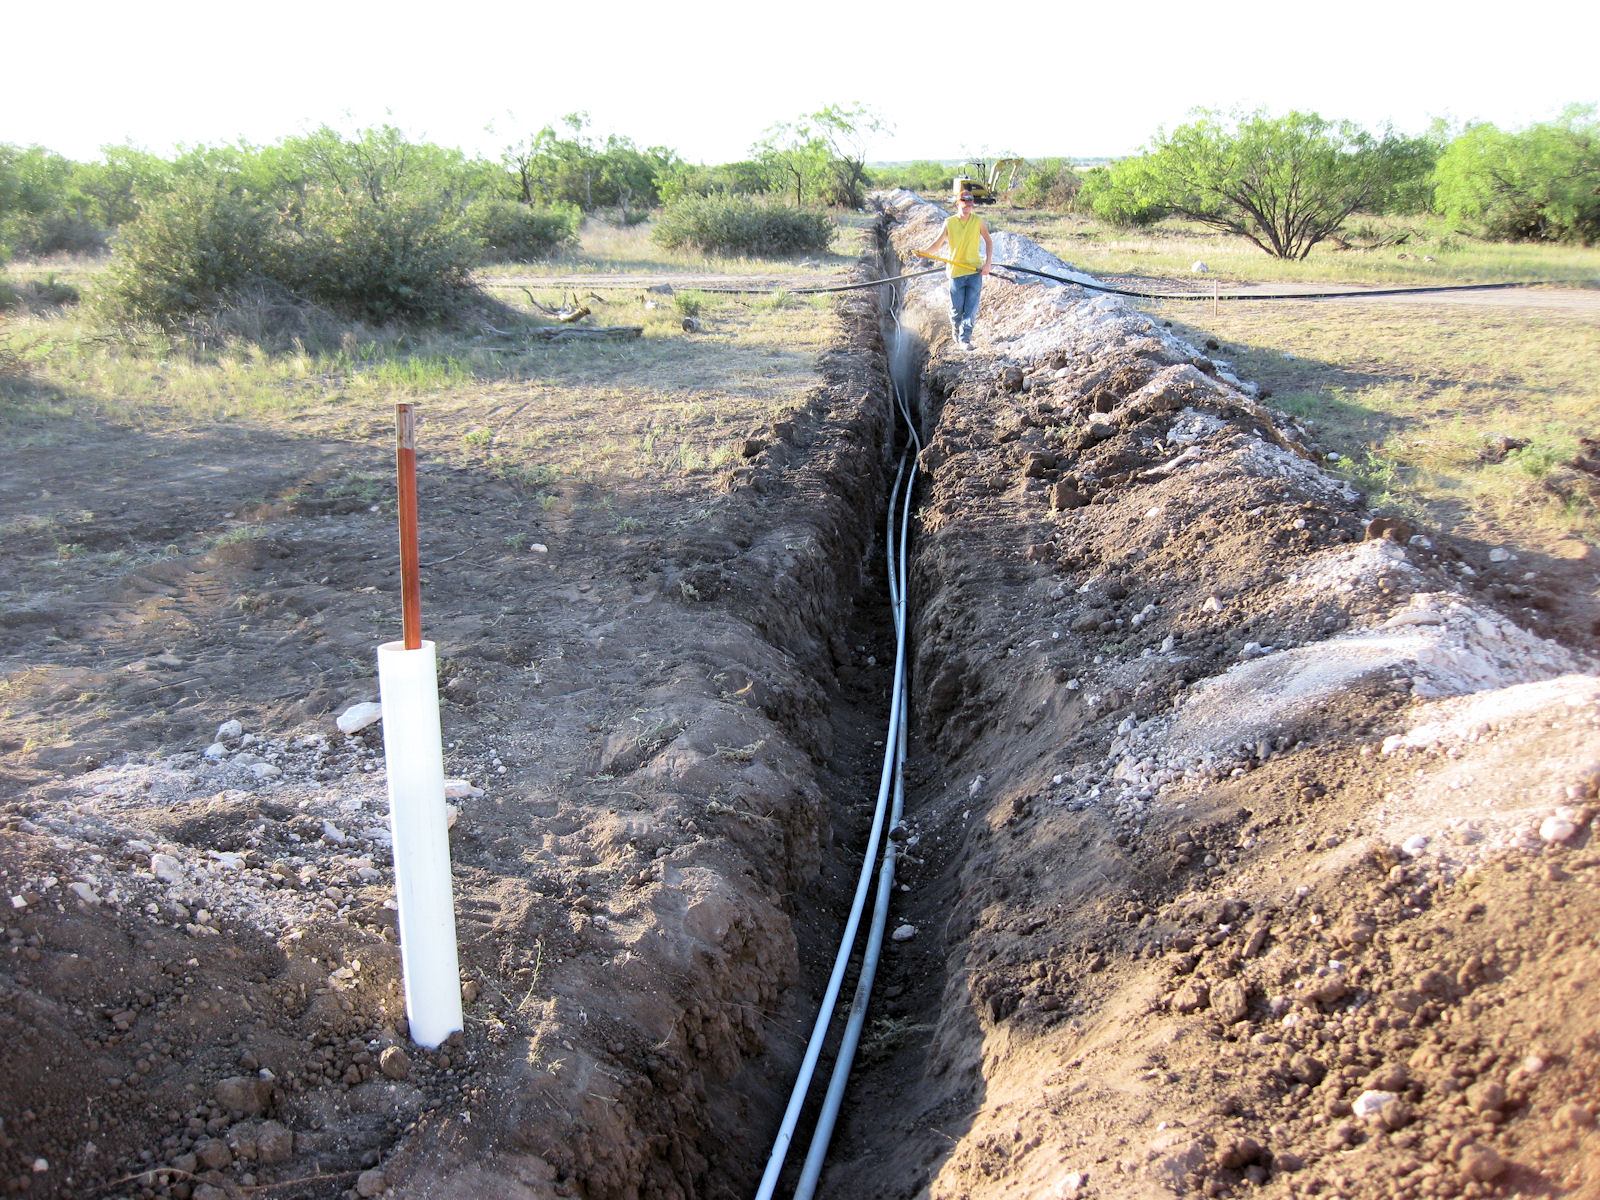
This is the trench with the water pipe and the conduit leading to the well head 450 ft from the trailer. The conduit
is tightly packed since this is a multipurpose line. We are going to install a Ventera VT-10 wind turbine at the
water site so we are running not only power to the well, but power lines from the wind turbine- (3 phase wild AC).
I've also included an extra ground wire, and a shielded Cat 5E cable for network communication to the site of the water well/
wind turbine site.
The reason for placing the wind turbine at the well site, is to place a water tank up in the tower to furnish gravity feed
water to the property. I'm not sure how practical it is, but it will definetly be a cool co-function of the Wind Turbine tower,
plus will get my "site" demo wind turbine well out of the way of anything under test.
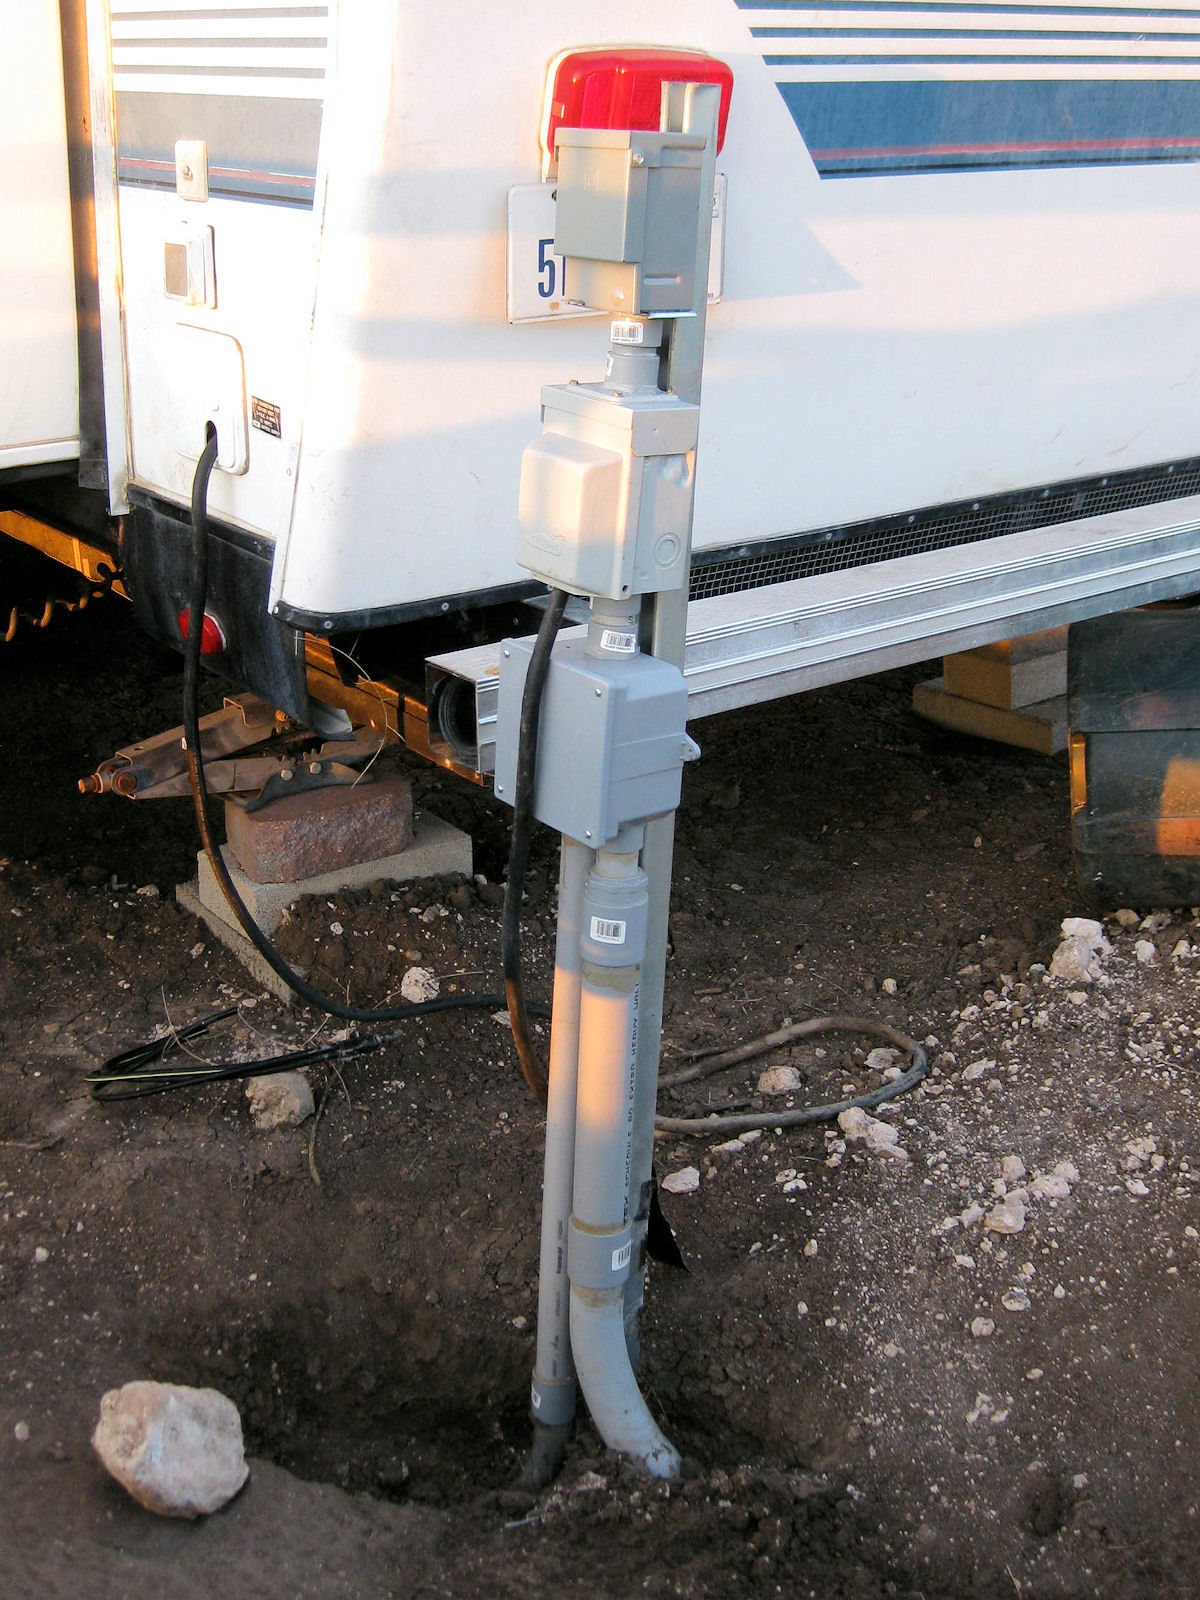
In the photo on the right, the trailer end of the multi purpose trench is shown. To the right is
where the wires go, and to the left is where the water pipe will go. A large junction box and switch for power to the well will be mounted
at the end of trench on the right. A hose bib will be installed for now next to the sewer pipe on the left.
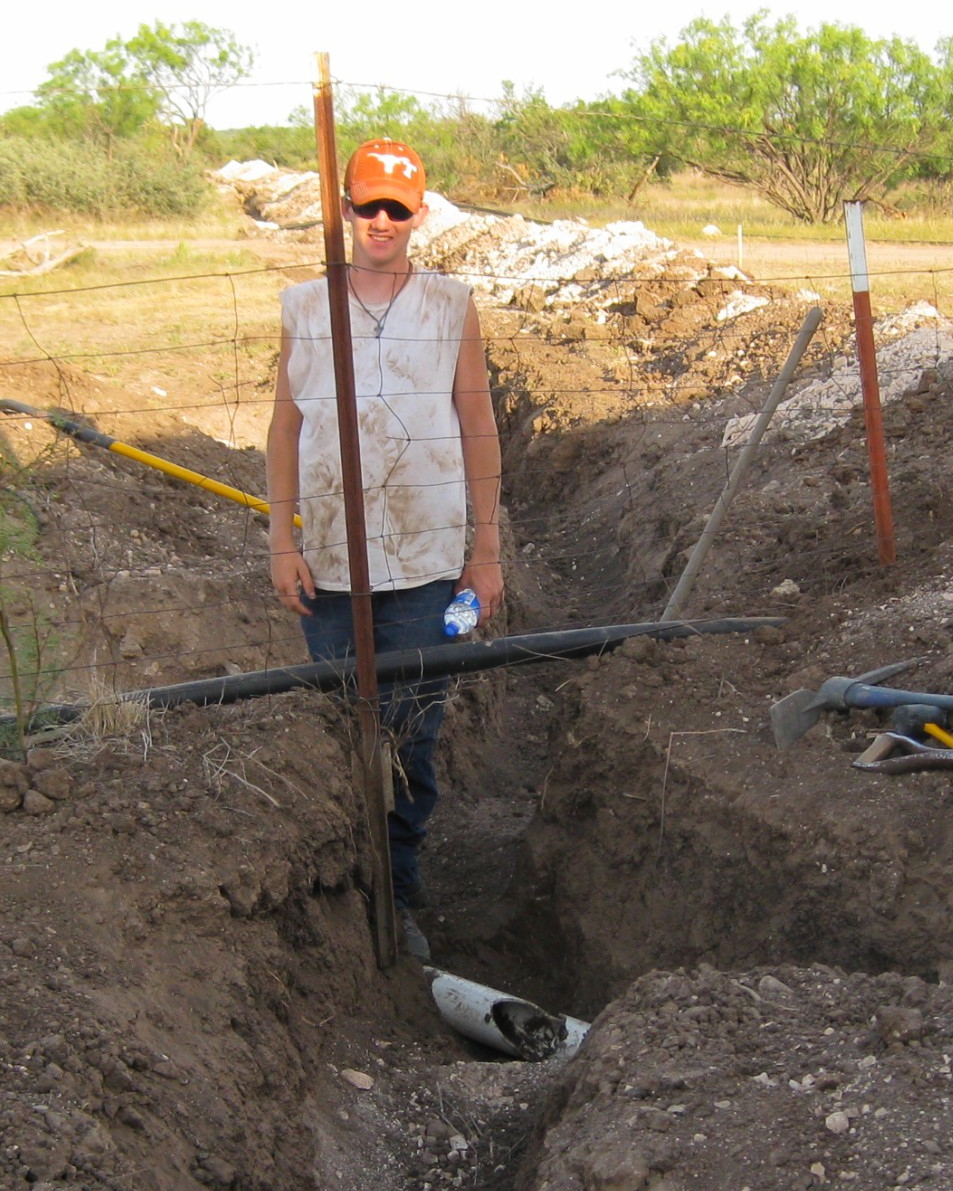
My incredibly enthusiastic machine operator prouldy shows off his "OOPS" moment, in which he busted the sewer line between
the trailer and the septic holding tank. This set us back about 6 hours that day, because the whole line had to be dug up
in order to splice it. Oh well.... I'm glad he did it instead of me. He got over it real quick.